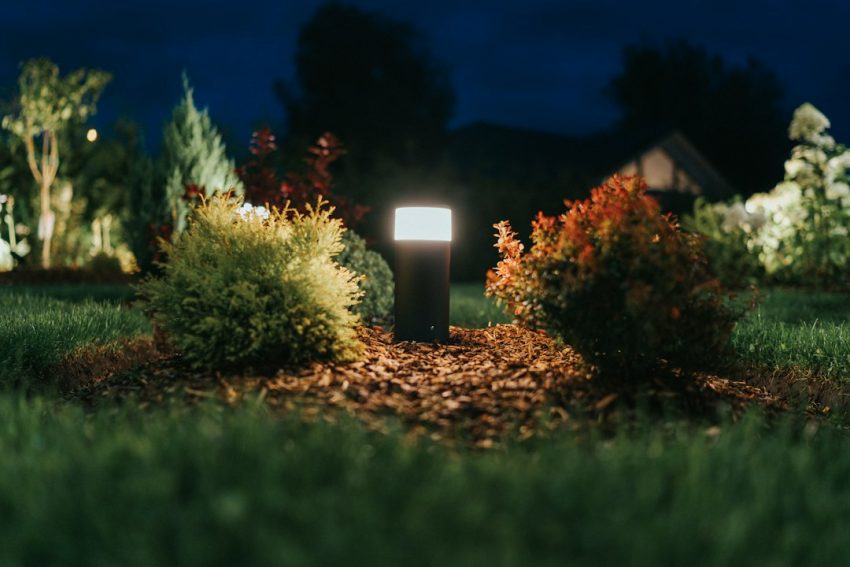
Outdoor landscape lighting can absolutely be affordable, and this guide will walk you through how to achieve a beautifully lit exterior without breaking the bank. The key is understanding what drives costs, where you can make smart compromises, and how to prioritize for maximum impact. Forget those images of sprawling, professionally installed systems with eye-watering price tags; you can create a stunning and functional lighting scheme on a modest budget with the right approach. We’ll cover everything from fixture types and installation considerations to smart purchasing strategies, helping you illuminate your outdoor spaces affordably.
Understanding the Cost Factors
Before we dive into specific solutions, it’s crucial to grasp what influences the overall price of outdoor landscape lighting. It’s not just the fixtures themselves; several components contribute to the final bill, whether you’re doing it yourself or hiring a pro.
Fixture Type and Quality
This is often the most visible cost driver. Lights come in a vast array of types, from simple path lights to complex uplights and wash lights, each designed for a specific purpose. Material quality also plays a huge role. Plastic fixtures are inherently cheaper than those made from cast aluminum, brass, or copper. While plastic can be tempting for budget-conscious buyers, remember that it often has a shorter lifespan and can degrade faster under harsh weather conditions. Better quality materials offer durability and a more refined aesthetic, but they come at a higher initial cost.
Power Source: Low-Voltage vs. Solar
Your choice of power source significantly impacts both initial setup costs and ongoing energy consumption. Low-voltage systems (typically 12V) require a transformer to step down household current, wiring, and careful planning. While the fixtures themselves can vary in price, the need for a transformer and potentially more involved wiring adds to the upfront cost. However, low-voltage systems offer consistent brightness and are highly reliable.
Solar lights, on the other hand, are self-contained units with a small solar panel, battery, and LED bulb. They require no wiring or external power source, making their installation incredibly simple and driving down initial costs substantially. Their main drawbacks can be inconsistent brightness (depending on sunlight exposure) and often a shorter lifespan for the integrated battery.
Installation Complexity
This factor is huge. Are you a DIY enthusiast, or will you be hiring a professional? DIY installation, especially for solar or simpler low-voltage kits, can save you a significant amount on labor costs. However, more complex low-voltage systems involving extensive trenching, multiple zones, and intricate wiring might be better left to an experienced electrician or landscape lighting specialist. Professional installation adds labor costs, but it ensures proper design, safety, and longevity of the system.
Wire and Transformer Quality (for Low-Voltage)
For low-voltage systems, don’t skimp on the wire and transformer. The transformer converts your home’s 120V electricity to a safe 12V for your landscape lights. Higher quality transformers are more efficient, durable, and come with features like timers and photocells. Similarly, using appropriately gauged, direct-burial rated wire is essential for safety and to prevent voltage drop over longer runs, which can dim your lights. Cheaper, thinner wire might save a few dollars initially but can lead to performance issues and require replacement sooner.
Budgeting Strategies for Affordable Lighting
Creating a compelling outdoor lighting scheme on a budget requires smart planning and strategic decision-making. It’s about maximizing impact where it matters most and making sensible compromises elsewhere.
Prioritize Key Areas
Don’t try to light your entire yard all at once, especially if you’re on a tight budget. Identify the areas that will benefit most from lighting. This typically includes:
- Entryways and Pathways: Essential for safety and welcoming guests.
- Architectural Features: Highlight a beautiful stone wall, a striking tree, or the front facade of your home.
- Seating Areas: Create ambiance and functionality for evening gatherings.
By focusing on these high-impact zones, you can achieve a dramatic effect with fewer fixtures, thus saving money. You can always expand your system later as your budget allows.
Mix and Match Fixtures
You don’t need every fixture to be top-of-the-line brass. A smart strategy is to mix higher-quality, more durable fixtures in prominent areas with more budget-friendly options in less visible or less critical spots. For example, invest in good quality uplights for your home’s facade or a prize tree, but use more affordable plastic path lights along a secondary garden path.
Consider DIY Installation
This is perhaps the biggest budget-saver. Many solar lighting systems are designed for incredibly easy, tool-free installation. Low-voltage lighting kits are also often DIY-friendly, typically involving simply laying out wires and connecting fixtures to a transformer. If you’re comfortable with basic electrical work (or following clear instructions), tackling the installation yourself can cut costs dramatically. Always prioritize safety, especially when working with electricity, and ensure you’re following local codes.
Opt for LED Bulbs
While LED fixtures or bulbs might have a slightly higher upfront cost than traditional incandescent or halogen, their energy efficiency and longevity make them far more cost-effective in the long run. They consume significantly less electricity, saving you money on your utility bills, and they last for tens of thousands of hours, meaning fewer bulb replacements. Many budget-friendly fixtures now come with integrated LEDs, further simplifying things.
Shop Smart: Sales, Kits, and Off-Brands
Timing your purchases can save you money. Look out for seasonal sales (especially end-of-summer or holiday sales) at home improvement stores. Lighting kits often offer better value than buying individual components, as they bundle a transformer, wire, and a set of fixtures. Don’t shy away from reputable off-brand or store-brand options; many offer good quality at a lower price point than premium brands. Read reviews to ensure quality.
Affordable Lighting Options and Where to Use Them
Let’s get practical about the specific types of lighting fixtures that fit a budget and how you can best utilize them to create impact.
Solar Powered Lights
These are the kings of affordability and ease of installation.
Path and Marker Lights
Simple solar path lights are excellent for delineating walkways, garden beds, or driveways. They offer a gentle glow that enhances safety and aesthetics without any wiring. While not as bright or consistent as low-voltage options, they are perfect for ambient illumination in less critical areas. You can find packs of these lights for very reasonable prices.
Spotlights and Uplights
Believe it or not, solar spotlights exist and are improving in quality. While they won’t match the power of a wired spotlight, a well-placed solar spotlight can effectively highlight a small bush, a garden statue, or a portion of a wall. Look for models with adjustable panels and heads for optimal sun exposure and light direction.
Decorative String Lights
Solar string lights are fantastic for adding a festive or whimsical touch to patios, pergolas, or trellises. They come in various styles, from classic globe lights to fairy lights, and are incredibly easy to hang. They create a wonderful ambiance for outdoor entertaining.
Budget-Friendly Low-Voltage Options
While low-voltage systems generally involve more upfront cost, you can still find affordable components and make strategic choices.
Starter Kits
Many manufacturers offer low-voltage landscape lighting starter kits that include a small transformer, a length of wire, and several basic path or spotlight fixtures. These kits are designed for DIY installation and are a great way to dip your toes into low-voltage lighting without a huge investment. They’re perfect for a small front yard or a specific garden area.
Plastic or Composite Fixtures
As mentioned earlier, plastic or composite fixtures are significantly cheaper than metal ones. For areas that aren’t subjected to extreme weather or direct scrutiny, these can be a viable budget-friendly choice. Modern composite materials are becoming more durable, but always check reviews for longevity. They work well for subtle path lighting or hidden accent lighting.
Basic LED Path Lights
Focus on simple, functional LED path lights. Avoid overly ornate or large fixtures if budget is a primary concern. Basic designs still offer excellent illumination for pathways and can blend seamlessly into your landscape. Many now come with integrated LEDs, reducing maintenance.
Simple Spotlights
Look for straightforward, single-LED spotlights in plastic or aluminum. These are perfect for uplighting shrubs, small trees, or architectural details. You might find better value in buying multi-packs rather than individual units.
DIY Installation Tips for Saving Money
Taking on the installation yourself is one of the most effective ways to cut costs. Here are some practical tips to ensure a successful and budget-friendly DIY project.
Plan Your Layout Carefully
Before you buy anything, sketch out your desired lighting plan. Mark where you want each fixture, what you want it to illuminate, and how the wiring (if low-voltage) will run. This prevents over-buying fixtures or wire and ensures you achieve your desired effect efficiently. Consider night-time testing with temporary lights (even flashlights) to visualize the impact.
Learn About Voltage Drop
This is crucial for low-voltage systems. Voltage drop occurs when the electrical current travels too far down a wire, causing the lights at the end of the run to be dimmer than those closer to the transformer. To avoid this:
- Use appropriate wire gauge: Thicker wire (lower gauge number, e.g., 12-gauge vs. 16-gauge) reduces voltage drop.
- Center feed or loop: Rather than running one long wire from the transformer, try to run a wire to the middle of your lighting zone and branch out, or create a loop back to the transformer.
- Don’t overload the transformer: Ensure the total wattage of all your lights doesn’t exceed the transformer’s capacity.
Understanding voltage drop will save you frustration and ensure consistent brightness across your system.
Rent or Borrow Tools
For low-voltage systems, you might need a trenching tool (a simple spade often suffices for small projects), wire strippers, and perhaps a multimeter for testing. For solar lights, you often need nothing more than your hands. Before buying expensive tools you’ll only use once, consider renting them from a home improvement store or borrowing from a friend.
Test as You Go
For low-voltage installations, connect and test your lights in sections as you lay out the wire, rather than waiting until everything is connected. This helps you identify and troubleshoot any issues (like a faulty connection or a bad bulb) before you’ve buried all the wires. It saves immense time and effort.
Bury Wires Safely
For low-voltage systems, burying wires isn’t just about aesthetics; it’s about protection. Bury direct-burial rated wire at least 6-12 inches deep to protect it from garden tools, pets, and the elements. Be mindful of existing underground utilities when digging. Mark your buried wires for future reference.
Long-Term Savings and Maintenance
An affordable lighting system isn’t just about the initial purchase; it’s also about minimizing ongoing costs. Smart maintenance and energy-efficient choices pay dividends over time.
Embrace LED Technology
We’ve touched on this, but it bears repeating: LEDs are the undisputed champions of long-term savings. Their low energy consumption translates directly into lower electricity bills. Their extended lifespan means you’re replacing bulbs far less frequently, saving you money on replacement costs and the hassle of maintenance. If you have older incandescent or halogen systems, consider gradually upgrading to LED bulbs.
Regular Cleaning and Inspection
A little bit of regular maintenance goes a long way. For all types of outdoor lights:
- Clean fixtures: Dust, dirt, leaves, and mineral deposits can accumulate on lenses and solar panels, reducing light output. Gently wipe them down with a damp cloth periodically.
- Check connections: For low-voltage systems, inspect wire connections for corrosion or loosening, especially at the fixture ends.
- Trim foliage: Ensure trees, shrubs, and other plants aren’t growing to obscure light output or solar panels.
This simple care routine helps maintain efficiency and extends the life of your fixtures.
Protect Solar Panels
For solar lights, proper placement and care of the solar panel are paramount for consistent performance. Ensure panels receive at least 6-8 hours of direct sunlight daily. Keep them free of debris, snow, or ice. If a solar light starts to dim significantly, the integrated battery might be nearing the end of its life. Many are replaceable; check if your model allows for this.
Smart Control Options
While some smart controls can add to the initial budget, they can also contribute to long-term savings and convenience.
Timers and Photocells
These are invaluable. A timer ensures your lights are only on when needed (e.g., dusk till midnight), preventing unnecessary energy waste. Photocells automatically turn lights on at dusk and off at dawn. Many low-voltage transformers come with these features built-in, and solar lights integrate them by design. This automation saves energy and ensures you’re not accidentally leaving lights on all day.
Motion Sensors
For security lighting, motion sensors are highly efficient. They only activate lights when motion is detected, saving energy and acting as a deterrent. You can find standalone motion-sensing lights or add-on sensors for existing systems.
By carefully considering your needs, prioritizing impact, and making smart choices about fixture types and installation, you can create a beautiful and functional outdoor landscape lighting system that enhances your home’s curb appeal and usability, all without overspending. It’s about being strategic and understanding where your money is best spent for maximum effect and long-term value.